Local Apps User Guide
This guide will help you set up and configure Local Apps using the Compatible Mode with automatic schema setup.
Prerequisites
- RealTimeX Desktop v1.0.53 or higher
- Supabase Account with an active project
- Supabase Credentials:
- Project URL (e.g.,
https://xxxxx.supabase.co) - Anon Key (starts with
eyJ...orsb_publishable...)
- Project URL (e.g.,
Adding a New Local App
Step 1: Access Settings
- Click on your user profile at the bottom-left of the screen
- Select Settings from the menu
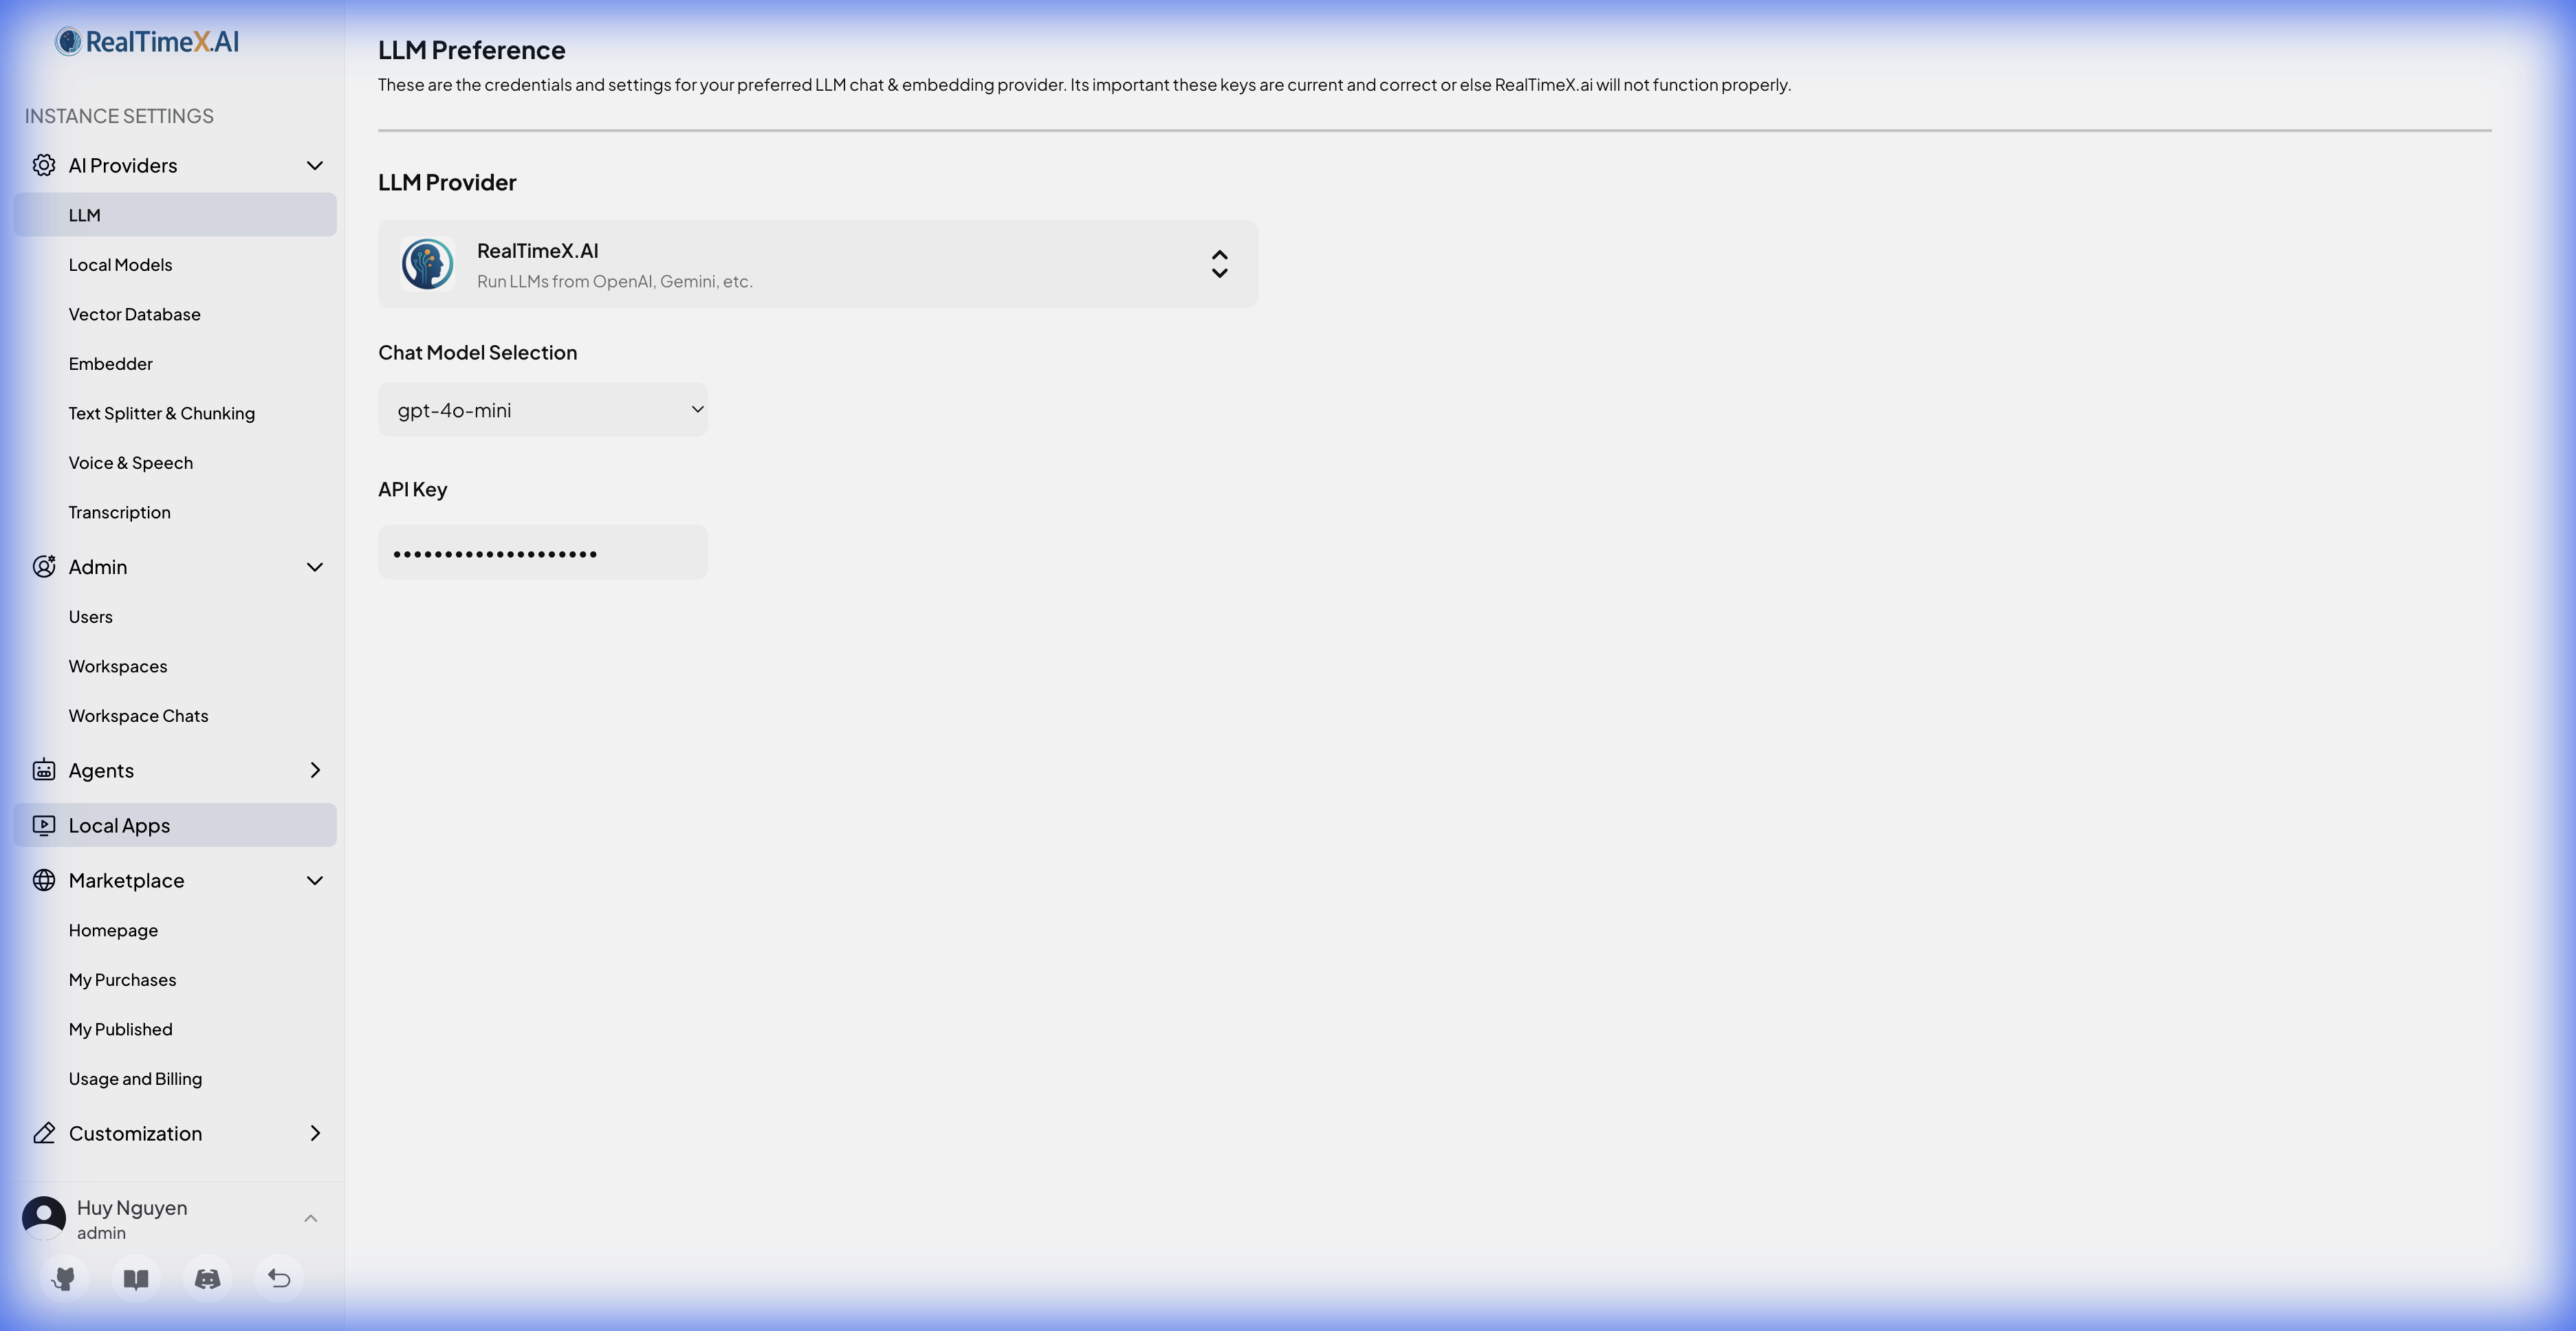
Step 2: Navigate to Local Apps
In the Settings sidebar, click on Local Apps under the Agents section.
Step 3: Add New App
Click the Add new app button in the top-right corner to open the configuration wizard.
Step 4: Configure App Details
- Enter a Display Name for your app (e.g., "Example App")
- Optionally add a description
- Click Next to proceed to database configuration
Step 5: Enable Database Subscription
- Toggle Enable Database Subscription to ON
- Enter your Supabase URL
- Enter your Supabase Anon Key
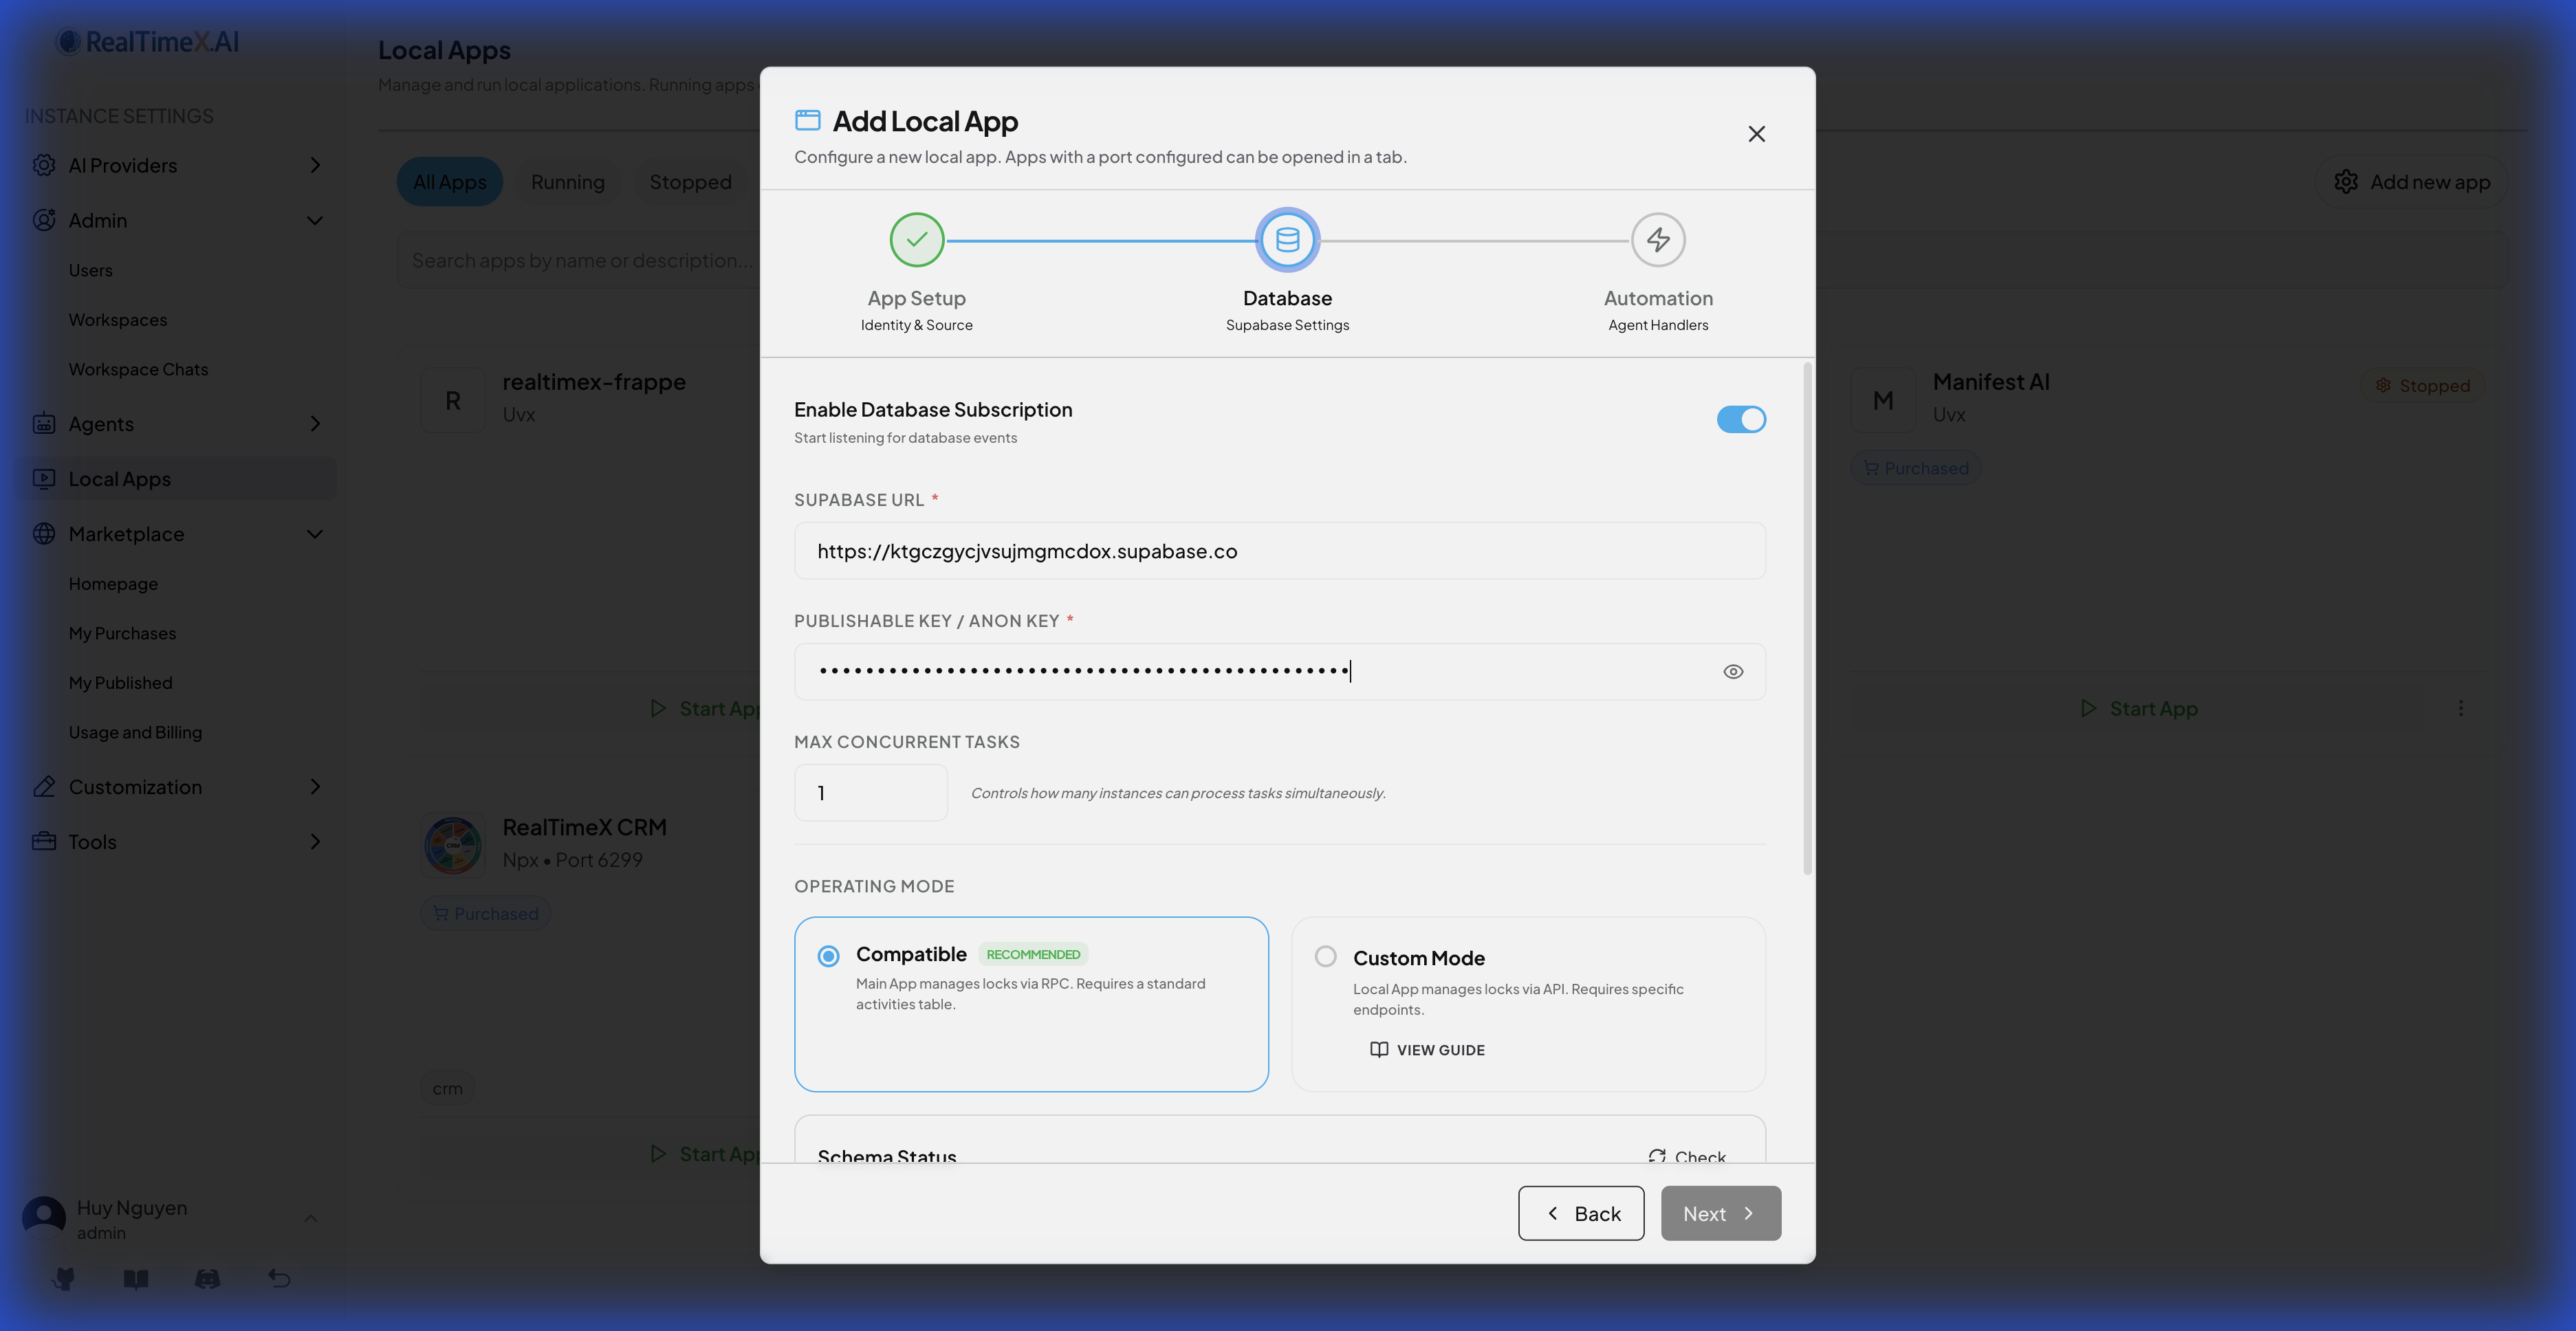
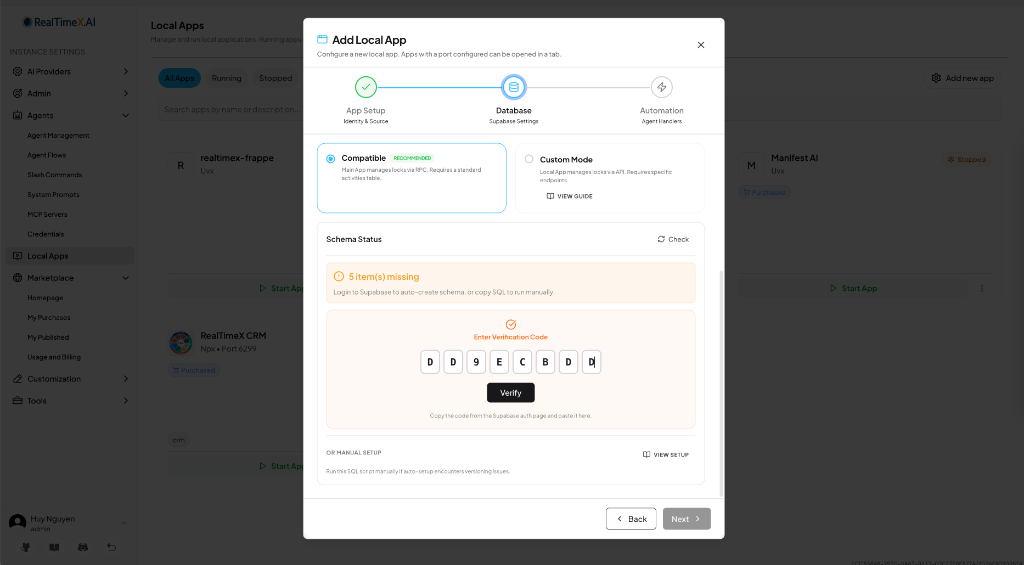
Step 6: Select Operating Mode
Choose Compatible mode (recommended for most users):
| Mode | Description |
|---|---|
| Compatible | Uses standard rtx_activities table. Automatic setup available. |
| Custom | For advanced users with existing database schemas. |
Step 7: Schema Check
After entering credentials, the system automatically checks your database schema:
- ✅ Schema Ready: All required tables and functions exist
- ⚠️ Missing Items: Some components need to be created
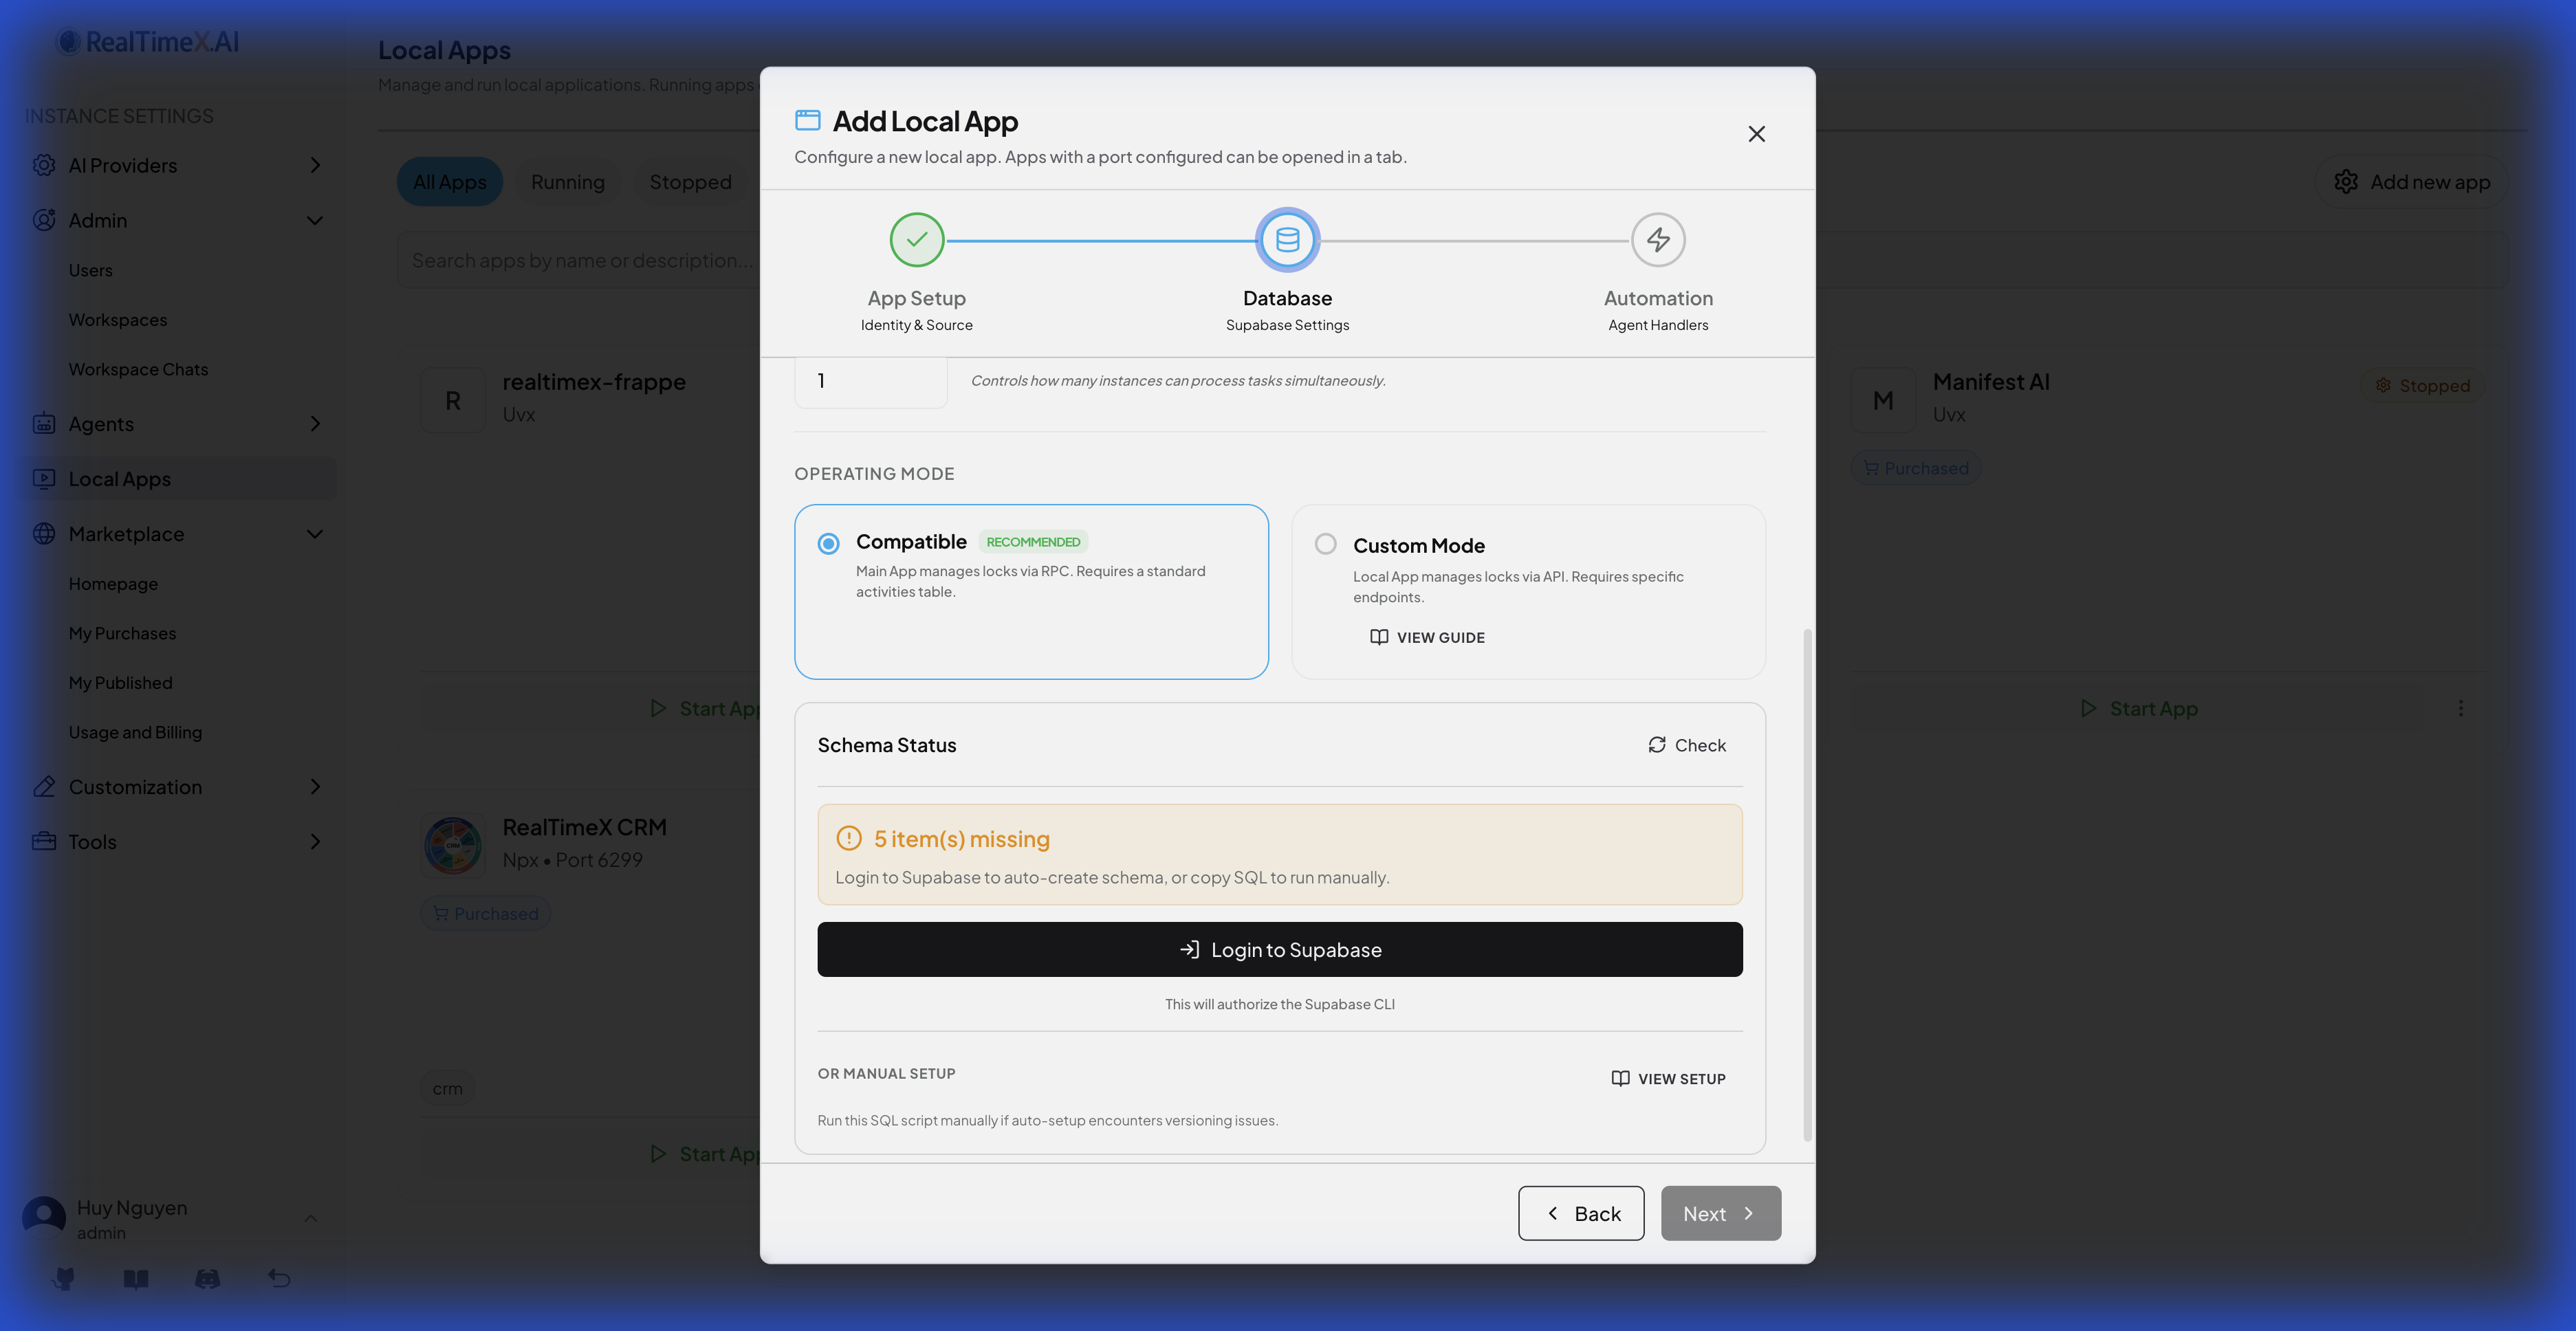
Step 8: Login to Supabase
If schema is missing, click Login to Supabase:
- A browser window will open for Supabase authentication
- Login with your Supabase account
- You'll see a page with an 8-character verification code
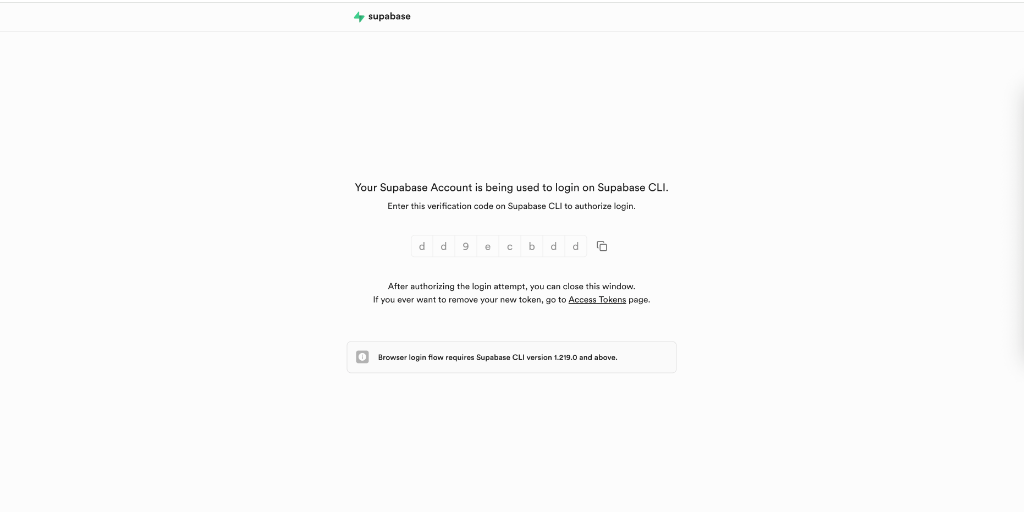
- Copy the verification code (e.g.,
dd9ecbdd) - Go back to RealTimeX and paste the code into the input boxes
- Click Verify to complete authentication
Multi-Account Support: If you need to use a different Supabase account, click Switch Account to logout and login with another account.
Step 9: Auto-Setup Schema
After successful authentication, you'll see "Authenticated via CLI" and the Auto-Setup Schema button:

Click Auto-Setup Schema to automatically create:
rtx_activitiestable with all required columns- RPC functions for task management
- Indexes for optimal performance
- Realtime publication for event streaming
The schema setup typically takes 5-10 seconds. You'll see a success message when complete.
Step 10: Configure Automation (Agent Handlers)
After schema is ready, click Next to proceed to the Automation step. This is where you configure which AI agents will automatically process events from your database.
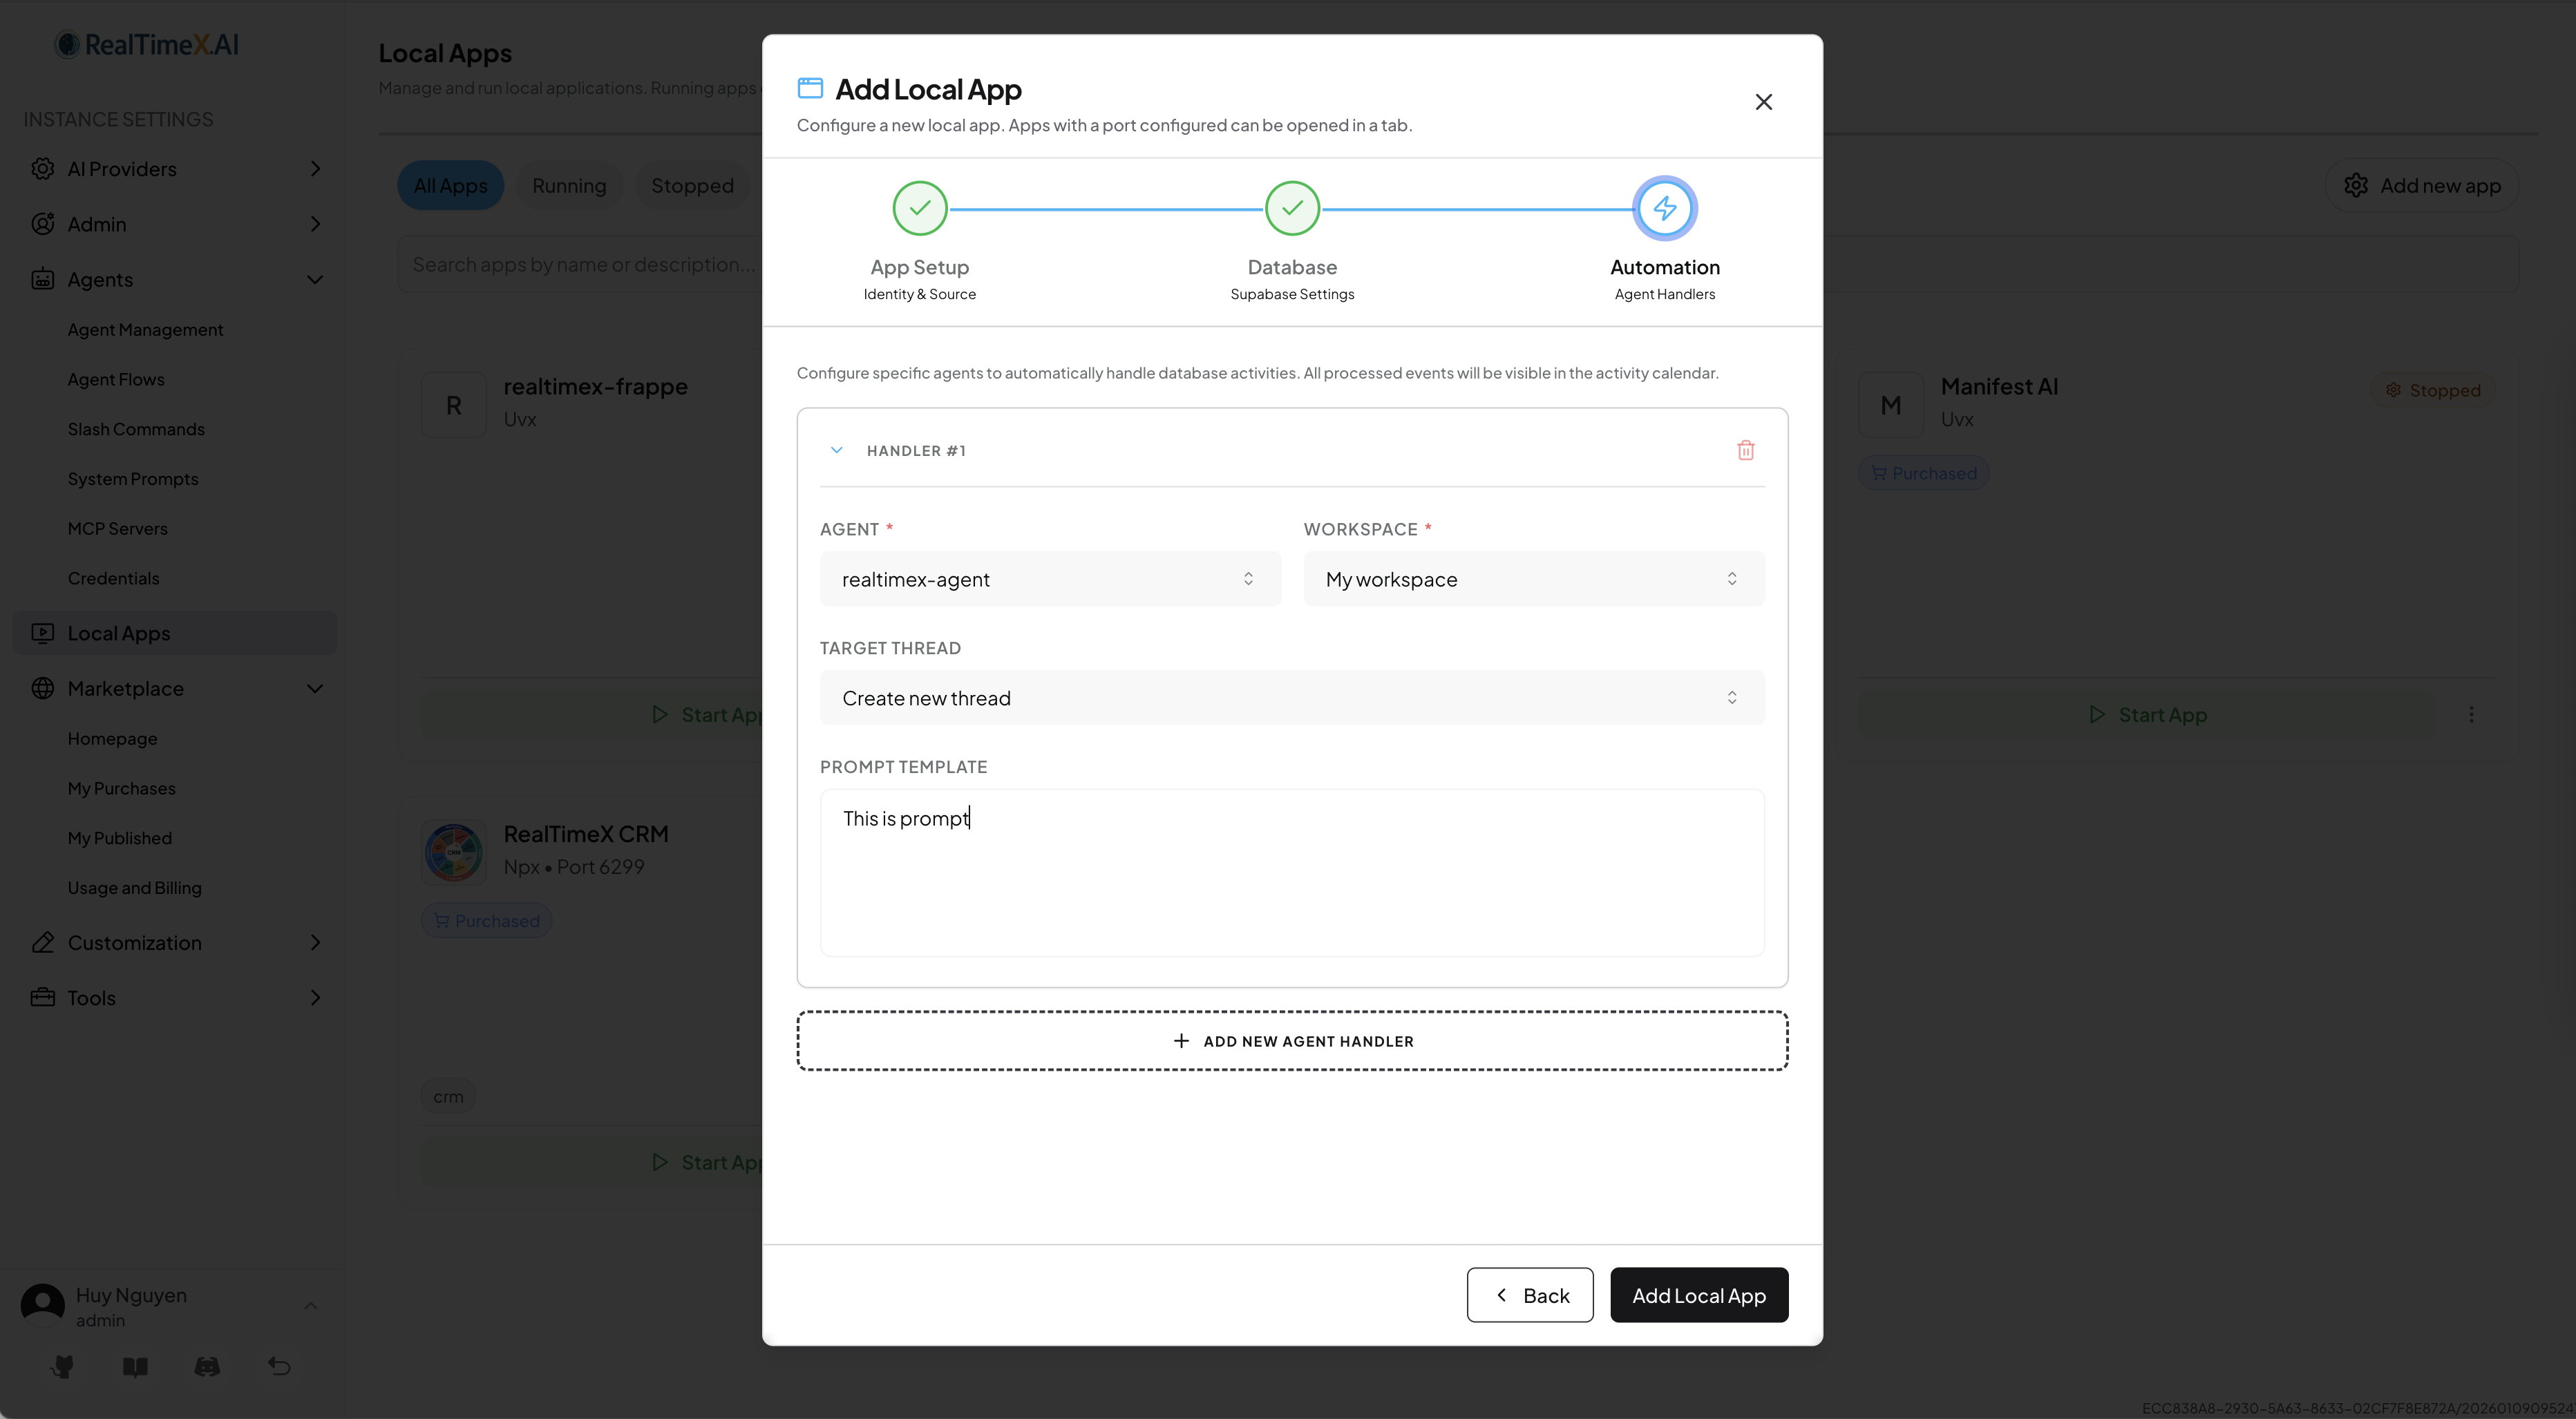
Agent Handlers Configuration:
| Field | Description |
|---|---|
| Agent | Choose an AI agent to handle events from this table |
| Workspace | Select which workspace to handle events |
| Thread | Select which thread to agent run or create new |
You can add multiple handlers to handle multipe task.
Step 11: Complete Setup
After configuring automation:
- Review your Agent Handlers configuration
- Set Max Concurrent Tasks for parallel processing (default: 1)
- Click Add Local App to complete the setup
Verifying Your Setup
After saving, your Local App will appear in the dashboard. Check these indicators:
| Indicator | Meaning |
|---|---|
| 🟢 Running | App is active and listening for events |
| 🟡 Stopped | App is configured but not running |
| 🔴 Error | Configuration issue - check credentials |
Common Issues
"Schema check failed"
- Verify your Supabase URL format:
https://xxxxx.supabase.co - Check that your Anon Key is correct (not the Service Role key)
- Ensure your Supabase project is active (not paused)
"Access Denied" during login
- Make sure you're logging in with an account that has write access to the project
- Try clicking Switch Account to use the correct account
"Login timeout"
- The Supabase CLI requires browser access - ensure popups are not blocked
- Try again and complete the browser authentication within 5 minutes
What's Next?
- Developer Guide - Build your own Local App
- Agent Developer - Create AI agents for task processing